7 weeks
fall '25
sketching
woodworking
CAD modeling
Stained Glass Table
A beautiful way to display stained glass in your home
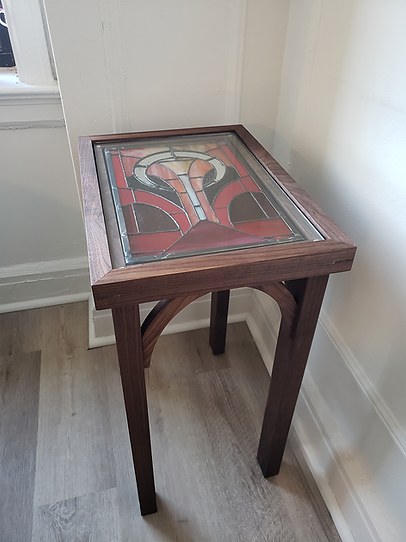
While taking Introduction to Stained Glass at the Pittsburgh Glass Center, I realized that I didn't have a way to display my finished piece. I challenged myself to incorporate contrasting mediums to make a piece of furniture I would actually use in my everyday life. So I sketched, designed, modeled, and constructed a table from solid walnut to encase my stained glass.

The Process of Stained Glass

I used a paper template as a guide to score and cut glass sheets to the approximate size.
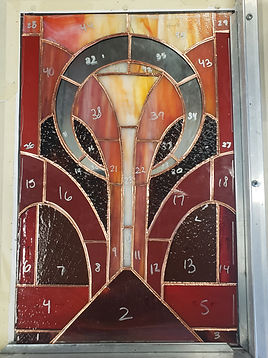
Next, I ground the pieces to exact size, foiled edges with copper tape, and burnished them smooth.

I finally soldered pieces together and added zinc channels as a frame.
Sketching & Modeling
I wanted my table to display the stained glass while complimenting its geometry.


I used SolidWorks to finalize the dimensions and clarify joinery.


Construction
I used a variety of machines to process, shape, and join the wood to form a table.


The Arches
Much like with the process of stained glass, I used a paper template---made using my SolidWorks model---as a guide, to cut the arches out using a bandsaw and spindle sander, and left extra space for a lap joint.
The Frame
I used a table router to cut the tabletop steps. The stained and clear glass will sit within these steps.

After gluing and clamping the frame together, I used a jig on the table saw to cut a keyed miter for stability.


I made each arch from two pieces to ensure the stability of the grain direction. As a result, each arch needed to be glued together, so I made jigs to secure the pieces together once I glued them.


Attaching it All
I used dominoes to attach the legs, and screws for the arches.
Finishing the Table
After sanding to 220 grit, softening the edges, and raising the grain, I used Danish Oil to seal and protect my table.


The Final Table
The finished height is 25 inches, at 14 inches wide and 19 inches deep.